[Guide] Backing your content up to HuggingFace via Colab
Today we're going to be looking at an interesting toy I forked from a couple of different people. Please note, that I am not usually a programmer so this is literally just patched content that's been tested!
(The generative pictures included were using models that were uploaded via this tool, and are upcoming updates to Epic Mix and a new mix we're working on!)
AT THE MOMENT I HAVENT PATCHED THIS FOR RUNPOD OR ANY OTHER PLACE BUT I WILL BE TRYING TO DO IT ASAP!
ALSO THIS IS MISSING THE 3.1 SECTION OF THE ORIGINAL CODE AS THAT ONLY WORKS WITH A WEBUI INSTANCE - THIS IS SEPARATED ENTIRELY FROM WEBUI.

So you'll see above that's the description i've poorly written in the colab code. Emojis don't always make everything pretty but i'm sort of still finding my way around decorating a colab to make it my own. (Yes feel free to laugh heartily in the comments)

First off before we go INTO THIS make sure you've gotten the updated file if you've copied it. For reference, I am not working off the main file when I do this so I don't share personal information somehow on accident.
Also note: This takes 0 resources, no web UI required, and no remote UI's needed apart from the optional file browser included.
First of all you'll notice this PROBABLY comes up, please copy it to drive and then YOUR copy you can turn this off so it remembers all your settings from previous times. (This goes for any colab btw)

Once you've copied it you'll definitely want to smack the CONNECT button. please note this takes 0 resources like said above apart from internet connection. Google drive is entirely optional on this, and same with the Elfinder plugin.

THIS IS Of course optional in that you may want to sit and fill everything out first.

THIS DOES HAVE A MOUNT DRIVE OPTION - and is probably going to be the first thing you do. But hold fire, lemme show you the other things that are enabled in this colab before we get down to where everything is actually useable.

ImJoy Elfinder, a popular remote UI for the filesystem. This helps you visually see where you're doing things and either way if you do or DONT use google drive options this can help you see and upload new content.
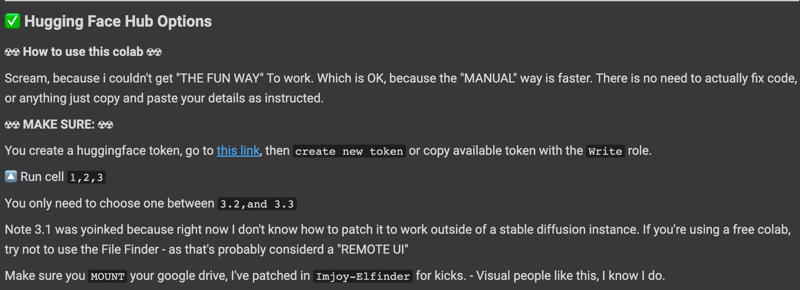
Here's the explanations for the HF hub, on Nocrypt's ORIGINAL NOTEBOOK, which i'm happy to pass over because it's one of the best for Colab users.. - He had the 3.1 section which allowed MULTIPLE uploads. If you're ALREADY ON HIS NOTEBOOK this colab is ACTUALLY still useful.
Why? Because when I was using his to update some new models i'm working on updating this week - I was able to patch in content to Huggingface to use for batch downloads. Sure, i could've gone in and gotten the Gdrive links, but that's actually kind of a pain when you don't want to make everything a public link.
(Literally, I get that some people don't mind but y'all know me I have like 10 repos with 20 model back mixes each and happily share them)
This DOES NOT REQUIRE COMPUTE CREDITS ON PRO and Free users CAN use it - be aware that the Elfinder plugin may count as a remote UI.
As the colab says:
☢☢ How to use this colab ☢☢
Scream, because i couldn't get "THE FUN WAY" To work. Which is OK, because the "MANUAL" way is faster. There is no need to actually fix code, or anything just copy and paste your details as instructed.
☢☢ MAKE SURE: ☢☢
You create a huggingface token, go to this link, then create new token or copy available token with the Write role.
🔼 Run cell 1,2,3
You only need to choose one between 3.2,and 3.3
Note 3.1 was yoinked because right now I don't know how to patch it to work outside of a stable diffusion instance. If you're using a free colab, try not to use the File Finder - as that's probably considerd a "REMOTE UI"
3.2 - Manually upload to HF one at a time (comma'ing the things don't work i've tried it)
(3.1 will come back when I learn how to patch it)
3.3 - TESTED - It's just a git push via github to Huggingface, and you'll need to make sure you run sections 1 and 2 or it won't be able to do it. It's similar to 3.2 but is evidently more stable.
You'll need to run 1 first to log in to your HF account and the details on how this works is here:
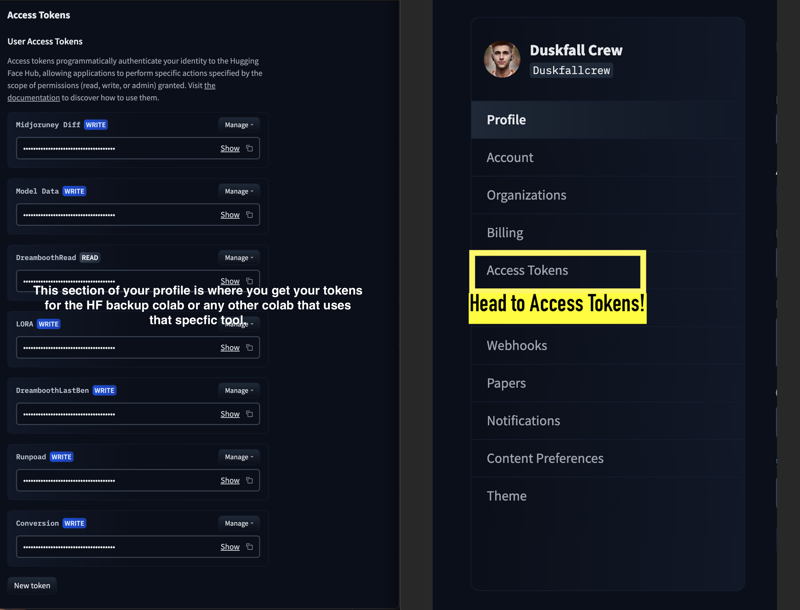
Note, i had to screenshot BOTH OF THEM together in one window because Civit wasn't letting me upload the separate files. Which is ok cause this is easy enough for you to see. Please note, i'm not here to give a tutorial on how to get an HF account. Two of my tutorials already have this. Just make sure you go to Access tokens on your profile after you've logged in. Yes you can "SEE" some of the information on mine, but you cannot see the actual strings of tokens.

WHEN YOU GO TO MOUNT it'll ask you if you trust this - that's entirely up to you, this code is in several million notebooks and I didn't make it. SHRUG - Every SD Web Ui notebook using gdrive mount has this.
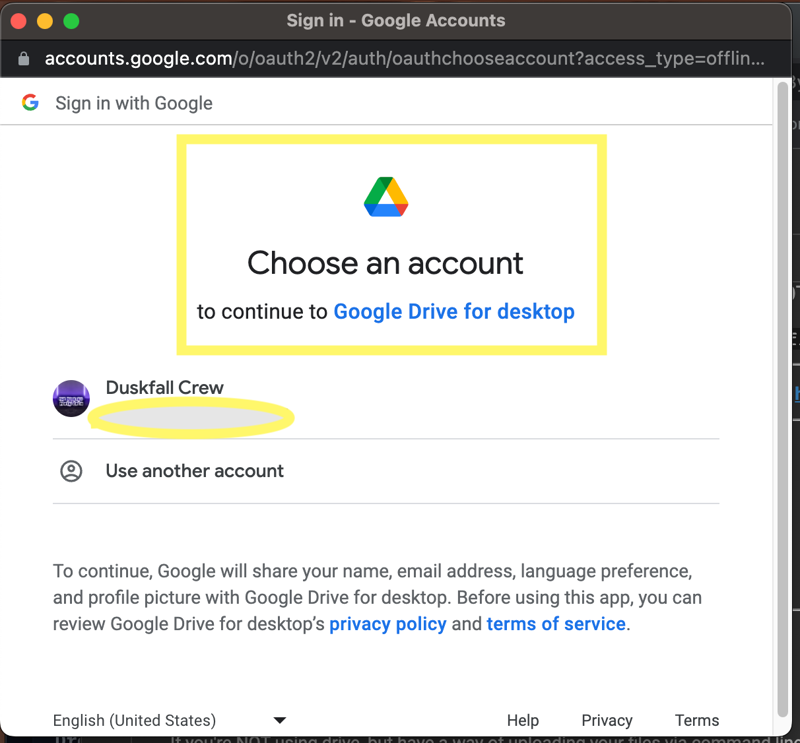
This is what will pop up after you basically go "Yes i trust this please Oauth my ass"
Now you've got your token you have the option of MOUNTING your drive. (mine somehow stays mounted I dont get this but y'know i'm brain damaged)
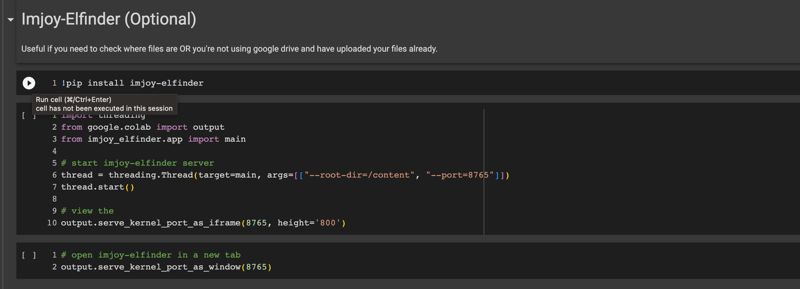
Optional again is the El-Finder.
Why am i sharing the code? because this isn't code I WROTE, you can easily patch these sets of code from Google or Elfinder from their colab samples.
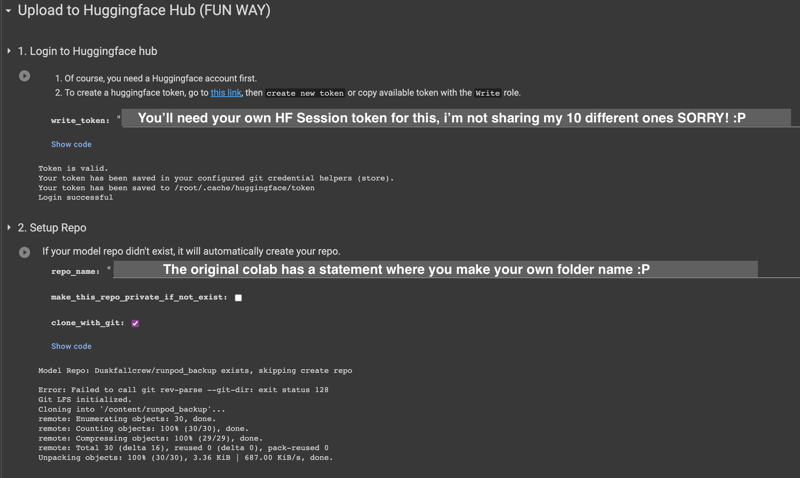
Basically you paste your HF token in section 1, you set up your repo name there. I'll be showing you in the next panel what the CLEAN useable notebook looks like:
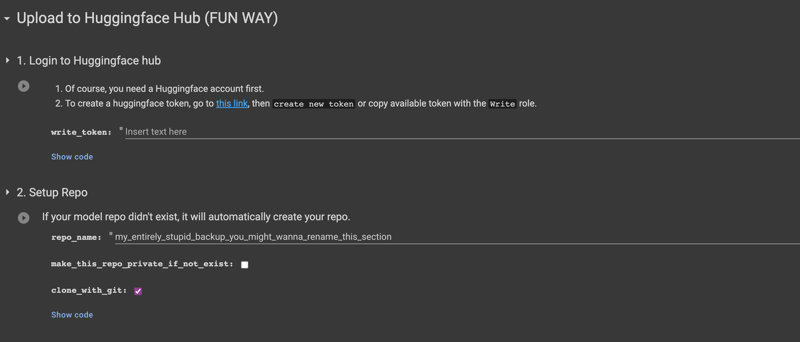
When you see the copy that i've shared with THIS tutorial (because I'm linking AND attaching the colab file in the zip file not just unusable images) you'l note that section 1 is clean, and section 2 has an optional name that in theory you really should replace lol.
ours says "RUNPOD BACKUP"
Note because of the HF filesystem your things cannot use SPACES you need to break it with underscores like "hf_backup".
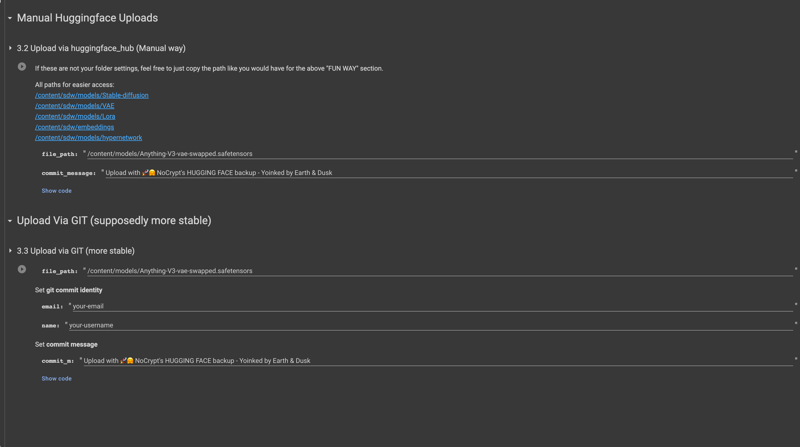
Manually you'll be using 3.2 if you don't like me know how 3.3 works _ I realize that i Should but i'm not about to patch my password and username into something that -- Oh screw it i'll do that quick LOL.
OK! 3.3 IS WORKING
Exception: it's just like 3.2, but it's evidently more stable.
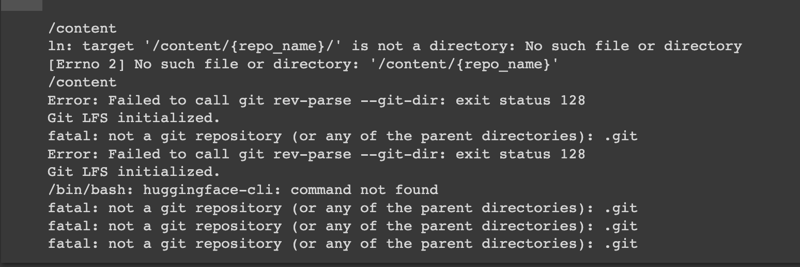
You're just adding your github email and username and if you haven't done 1-2 you'll get an error that looks like:
Now once you've uploaded it might look like:
(This actually shows you what I last uploaded to HF via this)
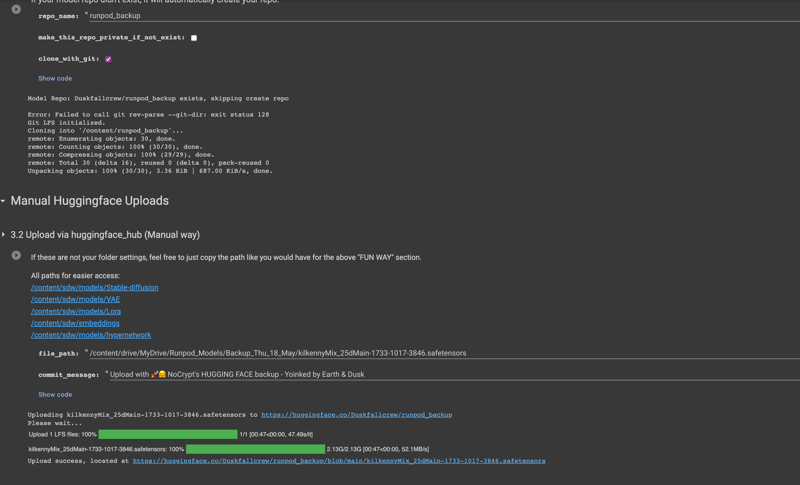
Again noting that MY thing hasn't patched the good old multi upload via folder, because the code is for a WEB UI based instance. Either you can fork my notebook or you can teach me oh wise ones.
NOW! onto the next fun part - what does your repo look like on HF?
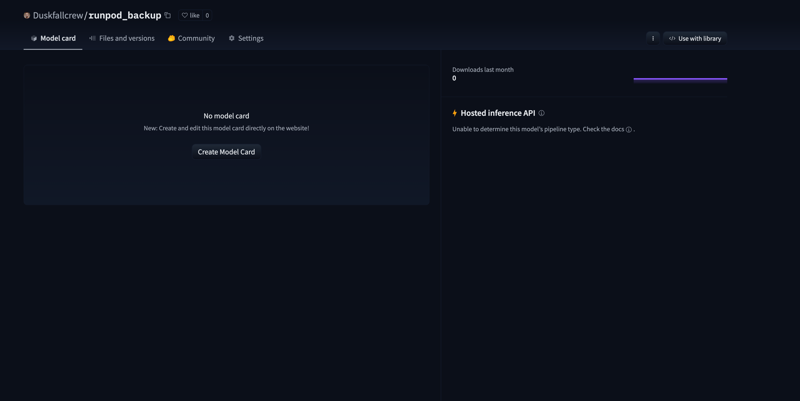
This is your empty repo, I haven't done a repo card on this and it's markdown lingo - I'm not really going to go into how that works but at the end of this i'll link some resources including Nocrypt's notebook and some cool toys to go hand in hand with this.
What does it look like with files?
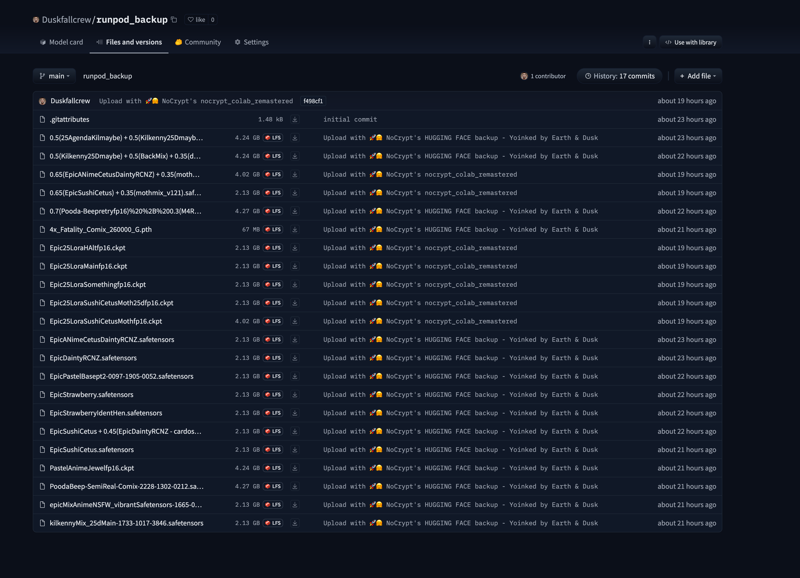
Ok so you'll note that I KEPT Nocrypt's original line because I took the code from his notebook and credited him so hard that basically the fork of this isn't really mine. If it's uploaded via mine it says "YOINKED B Y EARTH AND DUSK" - you CAN ACTUALLY change this in your notebook settings, it's not required but it's fun. This way i know which notebook i'm using. Lastben notebooks have had for dreambooth a way to upload when done. USUALLY holo's uses gdrive so no need to do it by hand for Loras.
RESOURCES:
The ACTUAL GITHUB Page for this: https://github.com/kieranxsomer/HuggingFace_Backup
Nocrypt's notebook: https://colab.research.google.com/drive/1wEa-tS10h4LlDykd87TF5zzpXIIQoCmq
Markdown lang tricks for HF cards: https://github.com/adam-p/markdown-here/wiki/Markdown-Cheatsheet
Whats included in the zip file: All the pictures, a PDF/docx copy of the tutorial text (and hopefully the images) - as well as a manual download of the most recent copy of the HF backup colab. (That being said you'll want to check Github for the latest updates)
☢ You can find updates on NoCrypt's toys: https://discord.gg/touhouai
☢ Earth & Dusk Discord because REASONS: https://discord.gg/5t2kYxt7An


