Github Repo:
https://github.com/receyuki/stable-diffusion-prompt-reader
A simple standalone viewer for reading prompts from Stable Diffusion generated image outside the webui.
There are many great prompt reading tools out there now, but for people like me who just want a simple tool, I built this one.
No additional environment or command line or browser is required to run it, just open the app and drag and drop the image in.
Support macOS, Windows and Linux.
Simple drag and drop interaction.
Copy prompt to clipboard.
Remove prompt from image.
Export prompt to text file.
Edit or import prompt to images
Vertical orientation display and sorting by alphabet
Detect generation tool.
Multiple formats support.
Dark and light mode support.
A1111's webui
PNG
JPEG
WEBP
TXT
Easy Diffusion
PNG
JPEG
WEBP
InvokeAI
PNG
NovelAI
PNG
ComfyUI*
PNG
Naifu(4chan)
PNG
* Limitations apply. See format limitations.
If you are using a tool or format that is not on this list, please help me to support your format by uploading the original file generated by your tool as a zip file to the issues, thx.
Download executable from above or from the GitHub Releases
Open the executable file (.exe or .app) and drag and drop the image into the window.
OR
Right click on the image and select open with SD Prompt Reader
OR
Drag and drop the image directly onto executable (.exe or .app).
Click "Export" will generate a txt file alongside the image file.
To save to another location, click the expand arrow and click "select directory".
Click "Clear" will generate a new image file with suffix "_data_removed" alongside the original image file.
To save to another location, click the expand arrow and click "select directory".
To overwrite the original image file, click the expand arrow and click "overwrite the original image".
Click "Edit" to enter edit mode.
Edit the prompt directly in the textbox or import a metadata file in txt format.
Click "Save" will generate a edited image file with suffix "_edited" alongside the original image file.
To save to another location, click the expand arrow and click "select directory".
To overwrite the original image file, click the expand arrow and click "overwrite the original image".
Importing txt file is only allowed in edit mode.
Only A1111 format txt files are supported. You can use txt files generated by the A1111 webui or use the SD prompt reader to export txt from A1111 images
Support for comfyUI requires more testing. If you believe your image is not being displayed properly, please upload the original file generated by ComfyUI as a zip file to the issues.
If there are multiple sets of data (seed, steps, CFG, etc.) in the setting box, this means that there are multiple KSampler nodes in the flowchart.
Due to the nature of ComfyUI, all nodes and flowcharts in the workflow are stored in the image, including those that are not being used. Also, a flowchart can have multiple branches, inputs and outputs.
(e.g. output hires. fixed image and original image simultaneously in a single flowchart)
SD Prompt Reader will traverse all flowcharts and branches and display the longest branch with complete input and output.
By default, Easy Diffusion does not write metadata to images. Please change the Metadata format in settings to embed to write the metadata to images
Batch image processing tool
Inspired by Stable Diffusion web UI
App icon generated using Stable Diffusion with IconsMI
Special thanks to Azusachan for providing SD server
A so-vits-svc model trained on a few of Soldier's voice lines from Team Fortress 2. Input audio is recommended to not be fast paced, the target also has to speak loud and clear.
Here is a link to the software I use: https://github.com/voicepaw/so-vits-svc-fork
You can either build from source or install through pip
Comes with a gui where you can indicate the weights, config, and input audio to transform
If you find better parameters, feel free to send me a picture in the comments below!
————————————
【google文档】
https://docs.google.com/document/d/1xFGVMr_ELDDW9WkKw27wjsWqSDNYlLWtsY93Ost-0QE/edit?usp=sharing
————————————
1.7版本更新,新增了一部分新出现的提示词
Version 1.7 has been updated with some new prompts
1.6版本是现在最全的,我加班了一整夜的时间来增补了一部分提示词
Version 1.6 is now the most complete. I worked overtime all night to add some parameters
总结了自2023,2,22-2023,5,10C站常用的tag串里面比较好用的一部分,并且筛除了过于简单的提示词。提示词合集为个人整理,可能并不全面。
本文中所有资料均可被随意使用,且任何权益不属于整理者本人。
All content in this article is free to use, and any rights and interests do not belong to the organizer himself.
形式格式上借鉴《元素法典》
This paper draws lessons from 《元素法典》 in form and format.
除内容本身外,最终解释权归 yuno779 所有
Except for the content itself, yuno779 reserves the right of final interpretation
合集内容为二次元相关tag串合集,最好使用二次元模型而非3D/2.5D
The content of the collection is a collection of quadratic correlation parameters, and it is better to use the quadratic model rather than the 3D/2.5D model
大部分示例图为KawaICE模型生成:冰可 | KawaiiICE[幼态特化模型]
Most of the examples are KawaICE model generation
本tag集会持续整理,详情请关注本帖
The parameters will continue to be sorted out, please pay attention to this post for details
我不希望看到那些拿着一两个tag关键词就说自己的tag并且不允许别人使用这种行为:也不希望某些人拿着“高贵”的AI图去FanBox等平台自诩所谓的“价值连城”,让别人付费才能购买那劣质的AI图。
I don't want to see people who take a word or two and say it's for themselves and no one else to use
I also don't want some people to take "noble" AI graphics to FanBox or other platforms claiming that they are "worth a lot" and make others pay for that inferior AI graphics.
————————————
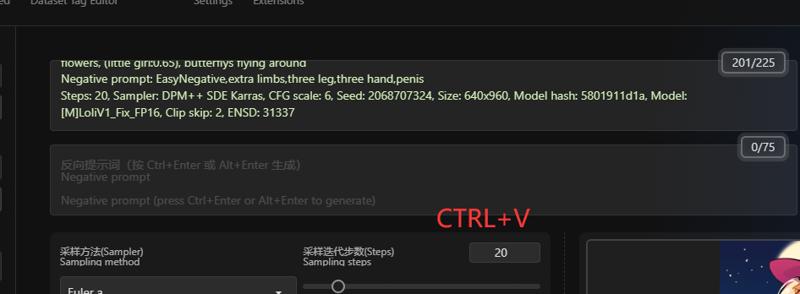
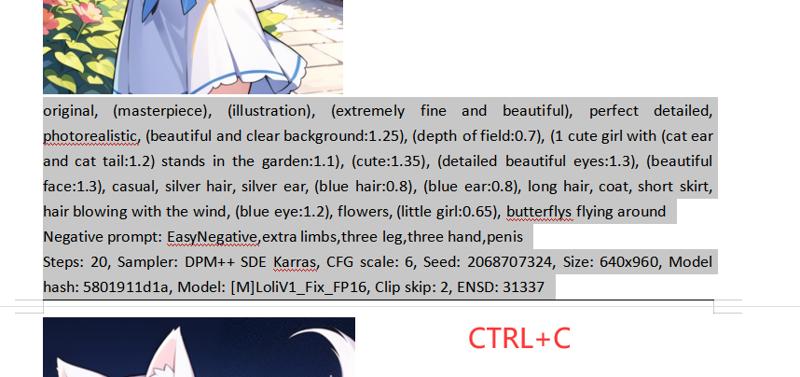
第一步:从文档复制提示词
Copy the parameters from the document
第二步:直接粘贴到正面提示词那一栏
Direct paste
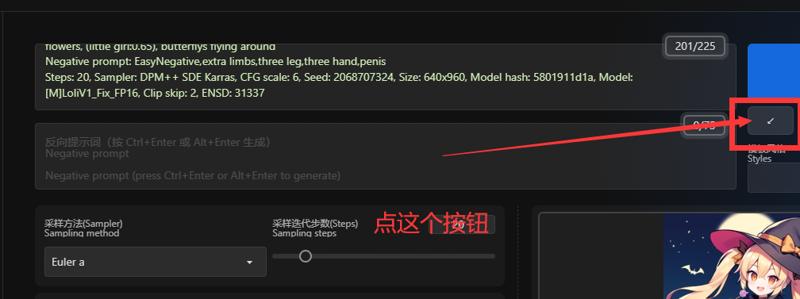
第三步:点击右侧的箭头,一键导入生成信息
Click the arrow on the right to import parameters with one click
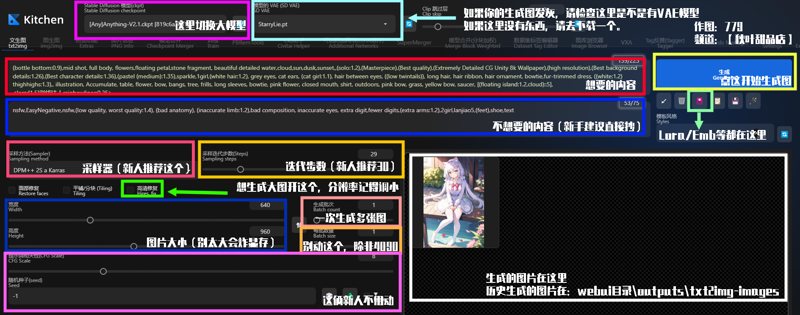
第四步:根据自己情况调整下面的参数,记得点一下随机种子
Adjust the following parameters according to your situation, remember to click on the random seed
————————————
感谢【秋叶甜品店(频道)】让我有了这个想法。之前就有人提出CIVITAI上模型的提示词都是万年不变的(例如向日葵女孩最早在2月就已经出现了,直到5月10日仍有新发布的模型使用这个提示词),于是就有了整理的想法。
Thanks to Akiba Dessert Shop (Channel) for giving me the idea. It was suggested earlier that the CIVITAI model's parameters would remain the same for thousands of years (for example, Sunflower Girl first appeared in February and was still used in new models released as of May 10), so the idea of reorganizing was born.
(I added all images from this post to .zip archive. Click download to see them in full resolution)
Everything I write here is about txt2img without img2img, hires.fix, inpaint and extensions like controlnet. I’m gonna focus on creating prompt, not how to make more detailed, upscaled or edited image. Everything was tested mostly on anime models so it may not work with realistic models.
Before we start I’d like to keep your attention to set up a few things if you haven’t done it yet. This will help you get good images.
First of all you should set up VAE you will be using with your model. (If model has baked VAE you don’t need to do anything). To do so download VAE file (if you haven’t) and put it into “stable-diffusion-webui\models\VAE” folder. Go to settings->Stable Diffusion, in SD VAE click blue arrows and select your VAE. Click apply settings.
You can also go to Settings -> User Interface -> Quick settings List and add there sd_vae if you want to have this setting in your txt2img tab.
For all examples I was using this VAE: https://civitai.com/models/23906/kl-f8-anime2-vae
I highly recommend you using Negative embeddings. All examples in this post were made with EasyNegative embedding. No additional negative tags.
To use it, download and put it into “stable-diffusion-webui\embeddings” folder. Then add its file name to negative prompt. (I suggest you use EasyNegative which you can download from here: https://civitai.com/models/7808/easynegative, but you can use other embeddings)
I suggest you try Clip skip: 2. It should work better with anime models. Try both - 1 or 2, to find what you like more.
To add Clip skip add CLIP_stop_at_last_layers in Settings -> User Interface -> Quick settings List, click apply settings and you should have this option in txt2img tab.
____
You can find many prompts on the Internet or this site but I think you should not just copy them, at least not at the beginning. Better way is to look at them and try every tag separately.
It’s important to know how a specific tag works because you will be creating compositions with it and adding random words to get result you want may be really frustrating. Sometimes tag is different from a normal word, so you can spend a lot of time trying to get it on your image which you could do with a simple tag.
Weights in your tags.
By adding more weight to your tag (tag:1.x/1.1/1.5 etc.) you can force AI to add something to your image, but I highly recommend you start every new prompt without weights, because changing it will change your image. If you use many different weights in many tags, it may change your image into a complete mess which we don’t want to. Sure, you can use it if AI is not giving you results you like but first see how image looks like on :1.0 and change this value only if you really have to. Be careful with this, set this value as low as possible (like (tag:1.1/ 1.2) not (tag:1.6/2), it concerns negative and positive prompt).
Personally, in many cases I’m actually decreasing weights rather than increasing them.
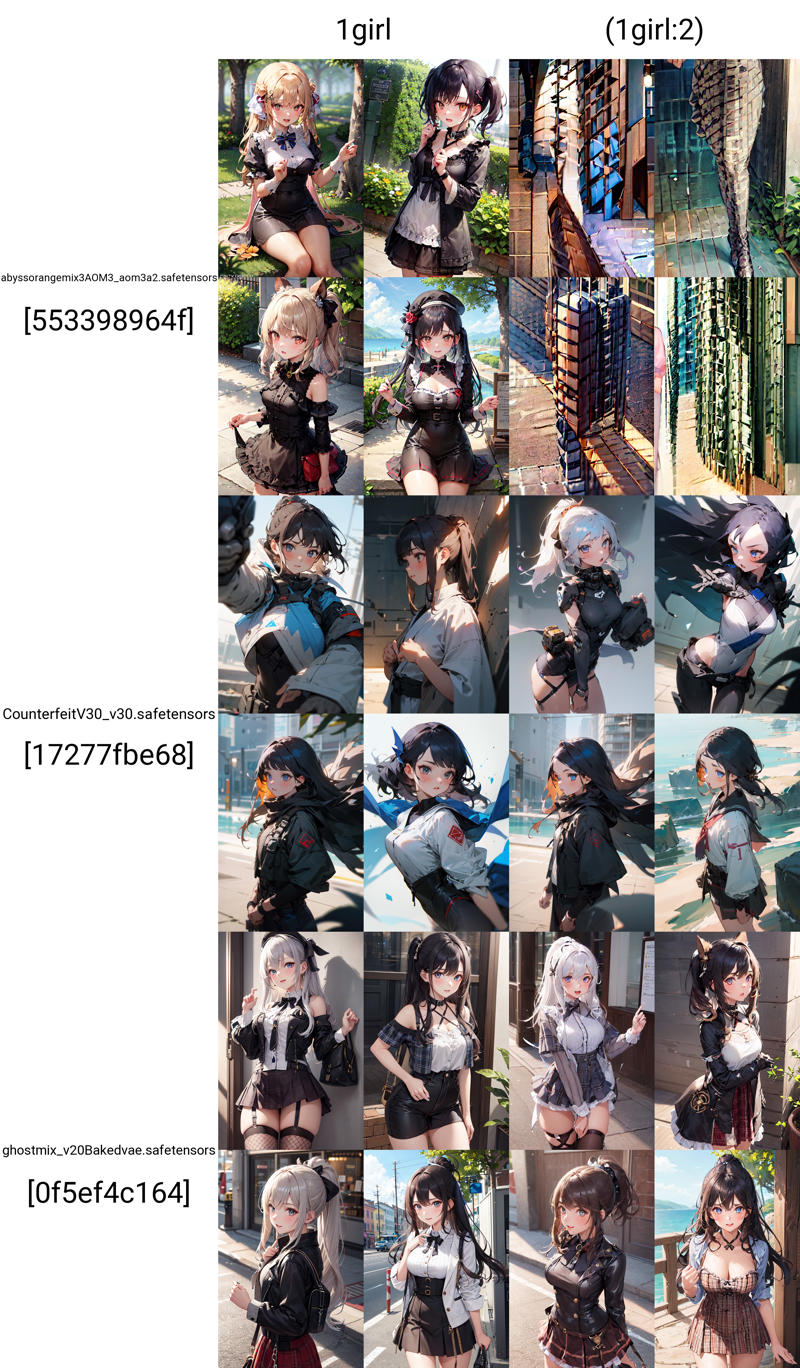
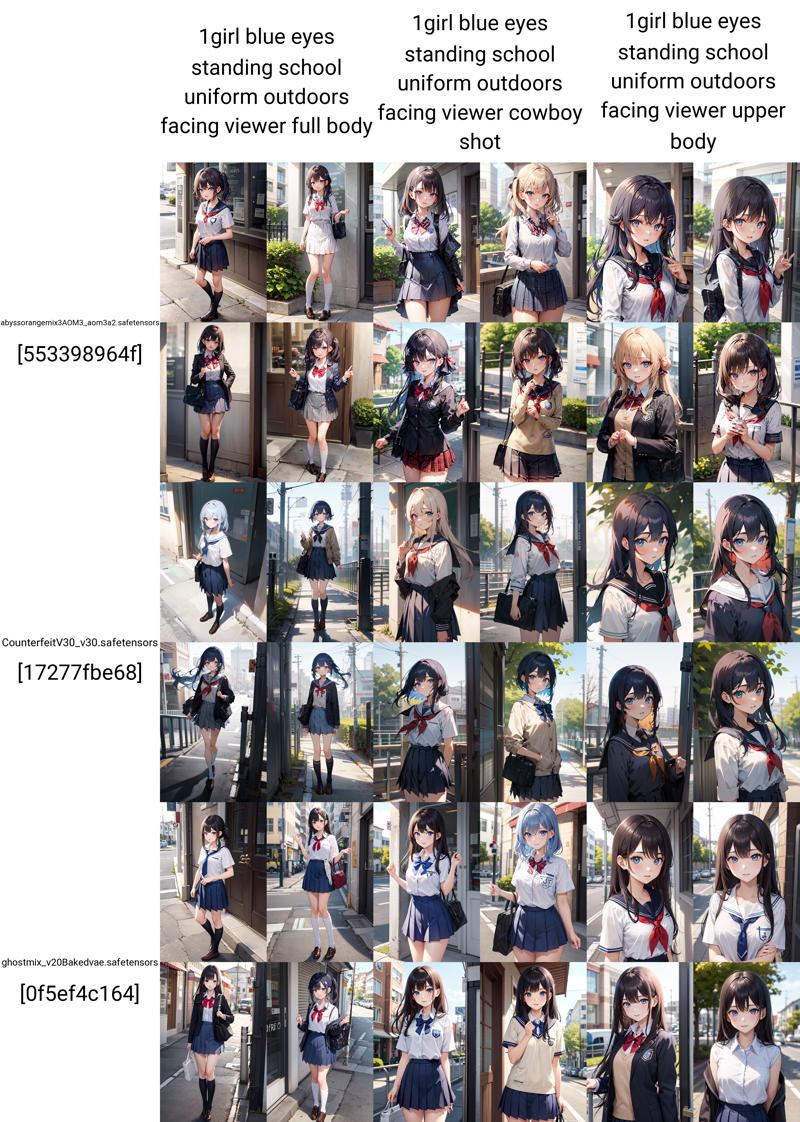
Example (prompt: 1girl in positive and EasyNegative in negative prompt):
How to write prompt?
In my opinion best way to start is using very simple prompt. Like:
P: 1girl
N: EasyNegative (this is negative embedding, if you are using other use their file name)
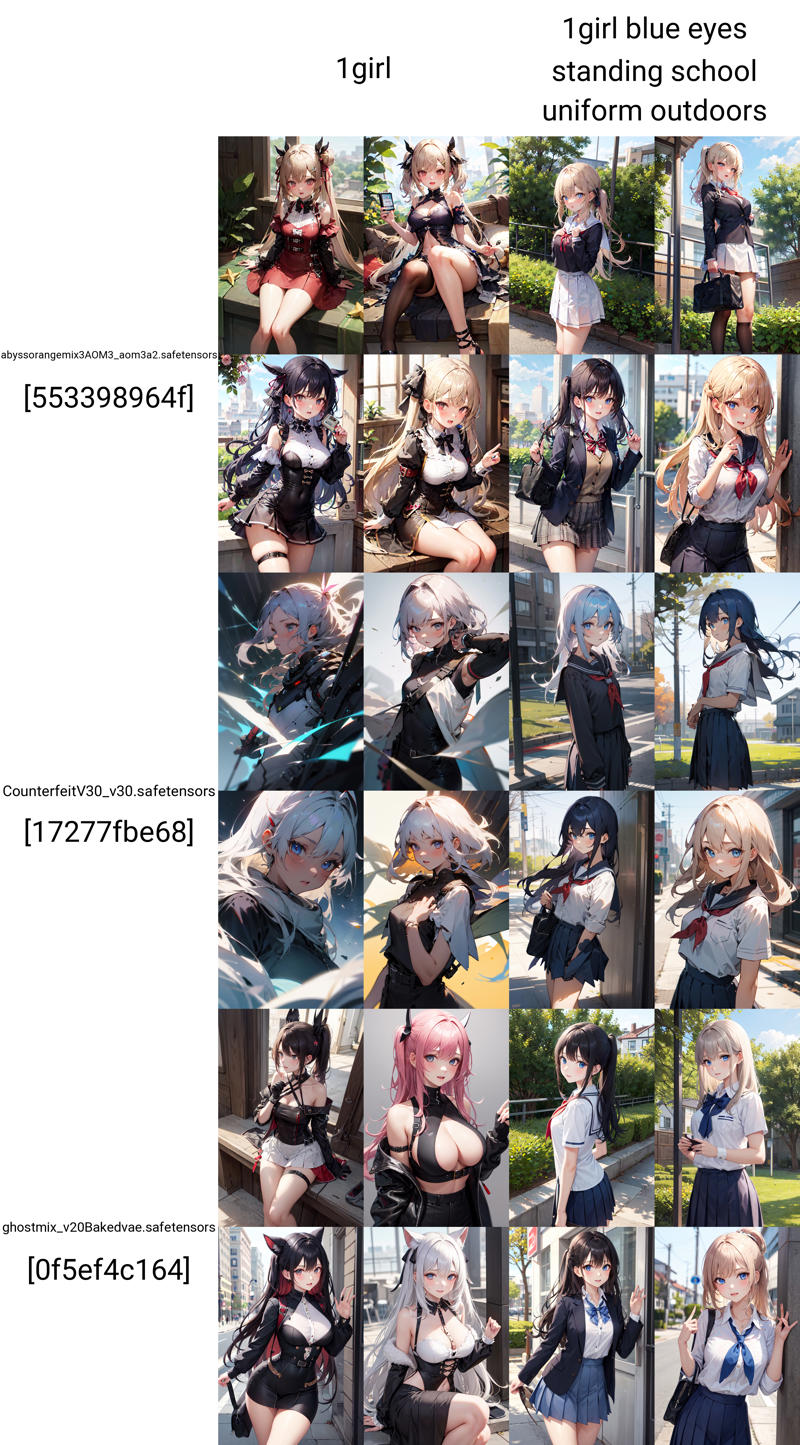
Then you can add tags to see how it will change your image.
Most anime models use Danbooru tags, so you can go to Danbooru site and search for tags you can use in your image. If you click “?” in tag you want, you can read a short explanation of what it is and see in which situations it’s used. If tag has _ in it use space instead, it should work better.
Basically, you need to be precise what do you want in your image. If you want something that is too general AI may not be able to generate it. Depending on model you're using, you may get decent results but on some models you may end up with weird objects or deformed image. To prevent this you should add at least few informations about what is going on and what the characters (if you want to have them in your image) look like. Try to think what elements your image needs. If for example you want to have person outdoors you can add details like grass, leaves, trees, but also blue sky, flying butterflies to get more natural look.
Don’t add too many tags, if you do it may be harder to get result you want.
I would think about creating prompt in this way:
[character description] + [actions the character performs] + [background] + [rest of your prompt]
Example:
1girl, blue eyes, black hair, long hair, upper body, school uniform, standing, hand up, facing viewer, classroom, chalkboard, kanji
or
1girl, white shirt, long sleeves, black jeans, backpack, full body, walking, landscape, mountain, night, from behind, snow
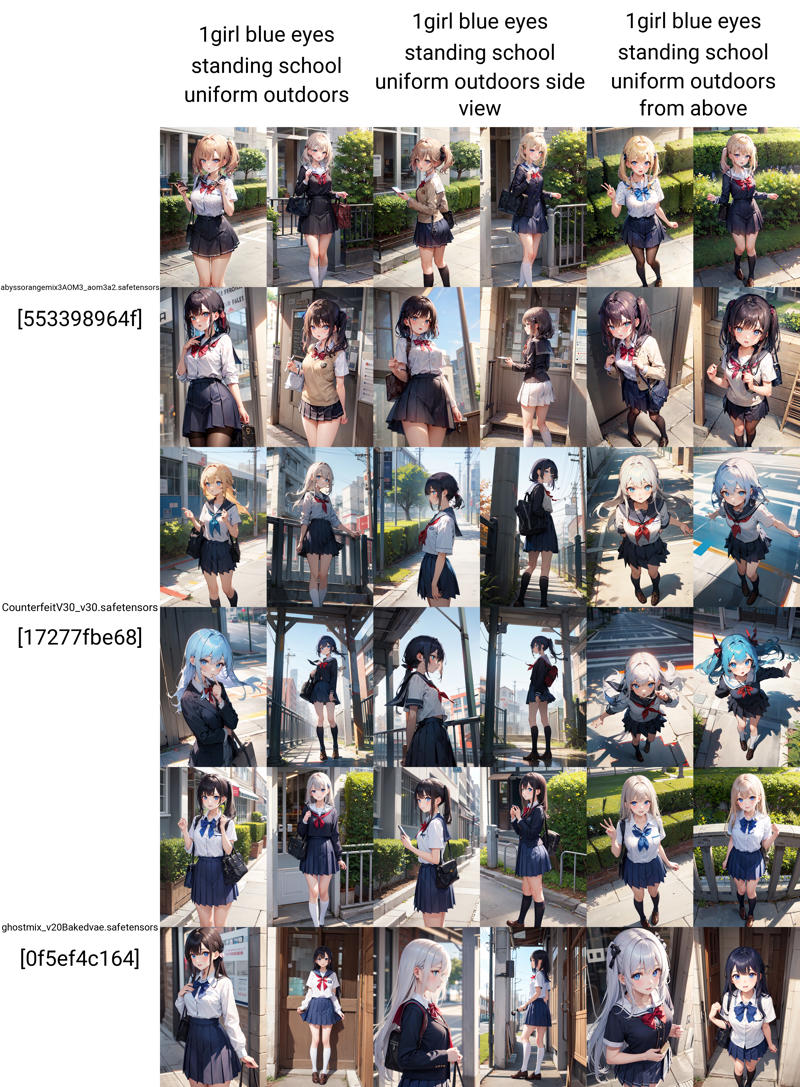
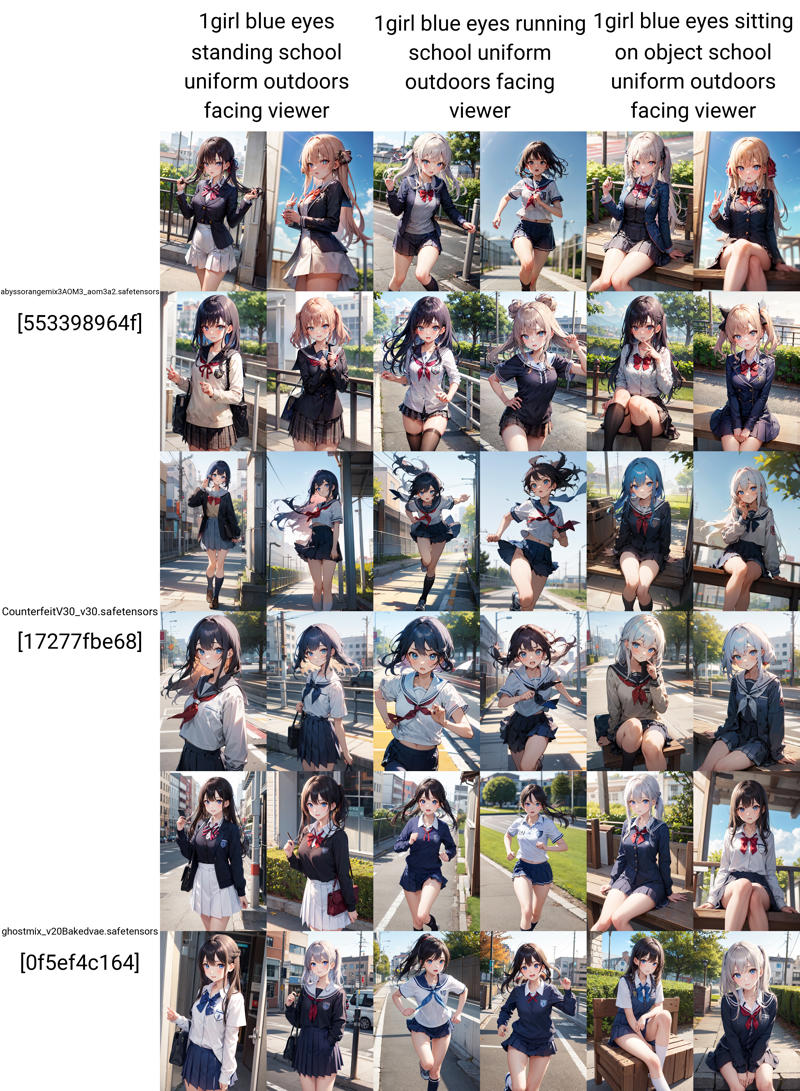
You may need tags for viewing angles and body position/movement to have more control of what is going on in your image. Of course clothes and background are important too but many models will add decent looking clothes even if you don’t add them to your prompt. With background you can specify elements you want to have in your image, you don’t need to write “trees in the background…”, adding outdoors, trees, autumn will work instead. Be sure to specify background or it may give you weird results. If you don’t have an idea for that you can add white background or indoors/outdoors.
Here is a list of tags that may help you:
dutch angle, from above, from below, from behind, from side, straight-on or facing viewer.
full body, cowboy shot, upper body, close-up.
standing, sitting (this one has many versions like wariza, crossed legs, sitting on object, etc. you can find them on danbooru), lying, jumping, running, walking, arched back, leaning forward, and so on.
If AI is giving you something you don’t want on your image add it to negative prompt. Some things are obvious like: you are getting cat on your image so you can add cat to negative prompt to (hopefully) remove it. Other things may not be so obvious. For example: you want your character to be wearing a skirt and shirt but AI gives you some odd clothes. It may be a good idea to add dress to negative prompt. AI may be confused and merge shirt and skirt together.
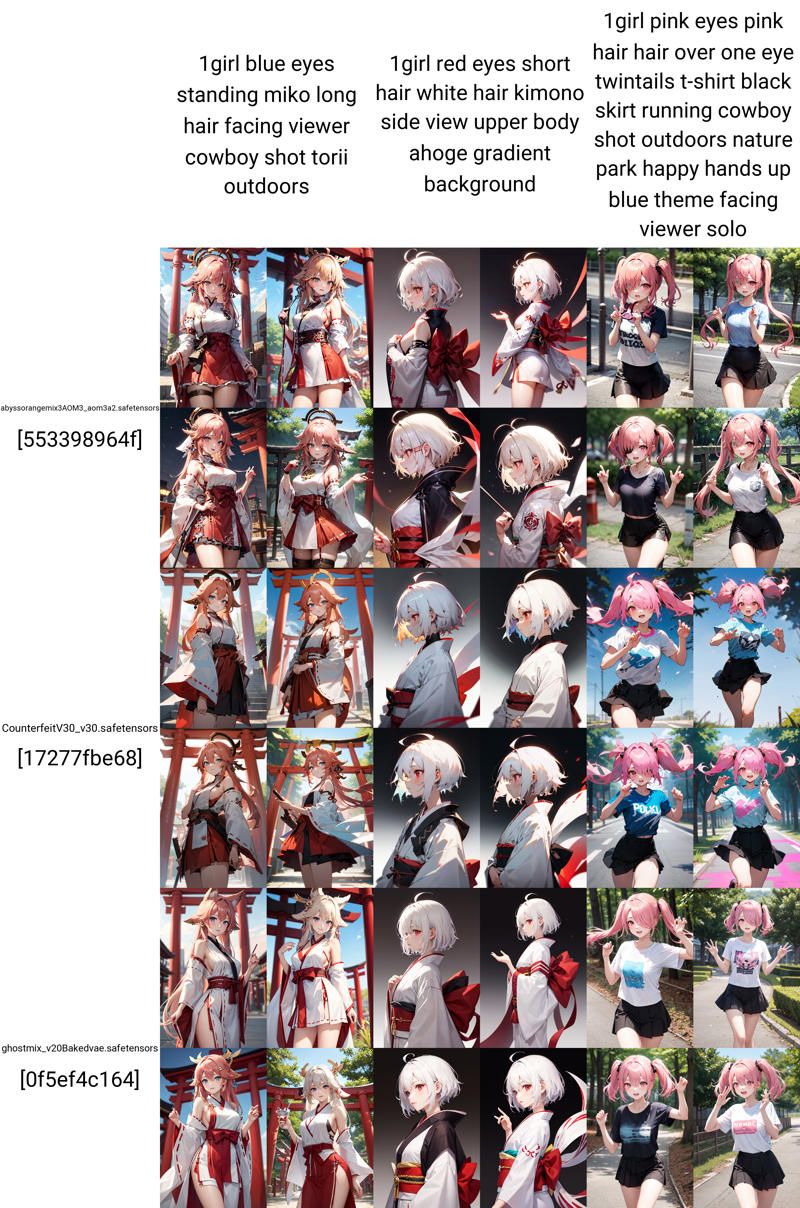
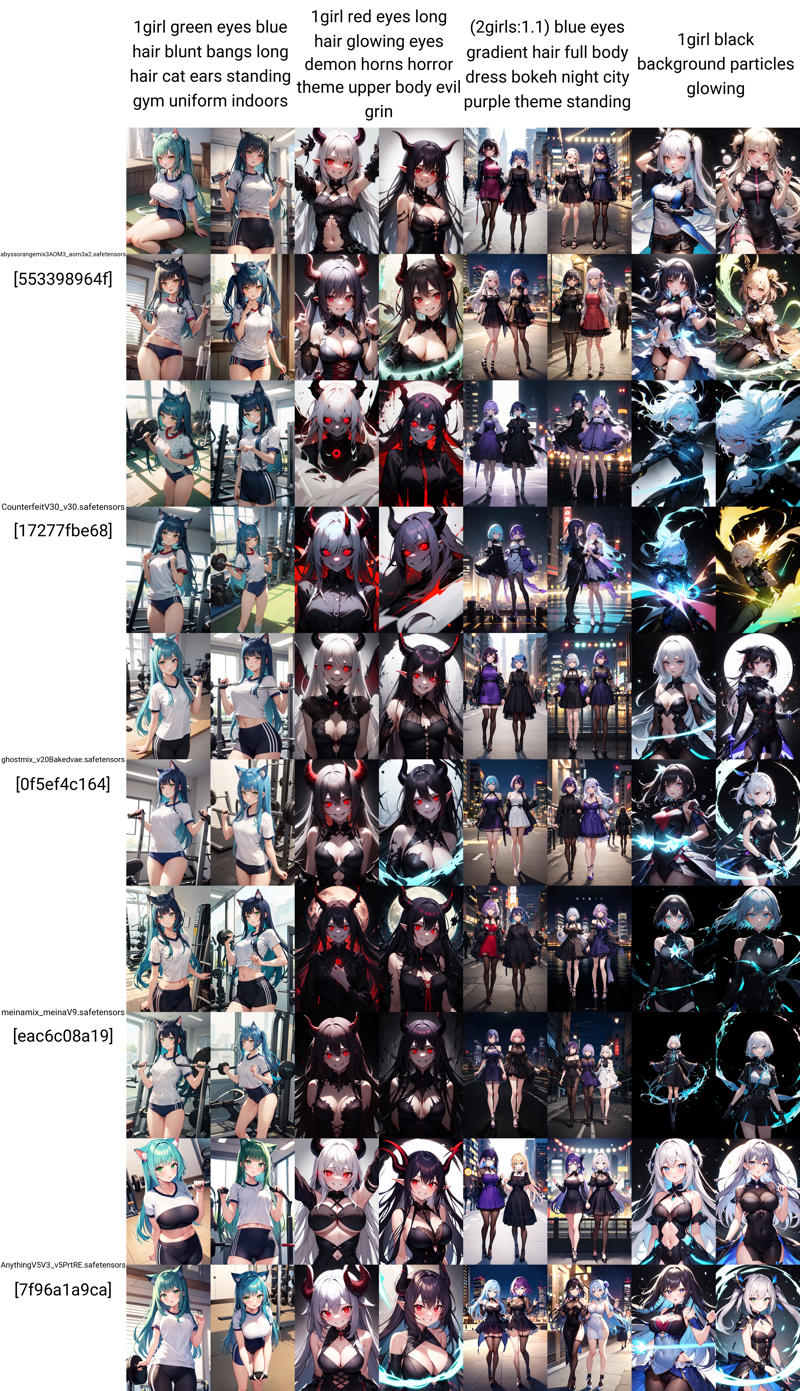
Some prompt examples:
This is just a basic pdf showing how I make images. Most of this is by my preference. You have any other questions feel free to leave a comment.
Cozy Nest is a UI extension for Automatic's sd-webui.
https://github.com/Nevysha/Cozy-Nest
Go in the extenstion tab and search for "Cozy-Nest" or install manually by following those step :
Open your SD-Webui
Go to Extension Tab
add Extenion by pasting this URL, since this extension is not public in the repository, yet https://github.com/Nevysha/Cozy-Nest
Fully integrated Image Browser IN BETA. Lots of bugs and missing features. Please be kind with Github issues.
Send to txt2img / img2img / …
Update with newly generated image
Drag and drop image
Resizable panels
Full Screen Inpainting
Customizable tab menu position (top, left, centered)
Cozy look with dark or light theme (add ?__theme=light
in url or set --theme=light
in Auto1111 start arguments to switch to light theme)
Bypass Cozy Nest by adding CozyNest=No
in URL param (ie: http://localhost:8501/?CozyNest=No) - useful for mobile
Save resize bar position / panel ratio in local storage
Customize accent color
Add or remove accent to the generate buttons
Customize font size
Move settings in a dedicated collapsible and movable tab
Smaller bottom padding bar to get a bit more screen space
Setting to center the top menu tabs
Setting to remove the gap between checkpoint and other quicksetting
Setting to center quicksetting
Loading screen with estimated percentage based on previous loading time
make settings tab movable
Extra network in a dedicated tab:
Resizable side panel
Customizable card size
Drag and Drop tab button inside or outside a “tab container” to bring them or move them from/out main menu
Extra Networks left sided tab.
Close Extra Network tab with escape key
Fetch version from a desicated json file hosted directly in the repo to an easier view of update of Cozy Nest.